Since I first heard of ESXi-Fling that allowed running ESXi on ARM processers, specifically the Raspberry Pi 4. Why would I want this? Raspberry Pi’s are great little SBC’s, but they are pretty limited compared to their x86 counterparts. 4 cores, 4-8GB, what am I thinking? Well, #1 – The Pi’s are great for little projects, and since I want to get back into development, I will be able to setup a build environment that includes an ARM build. This is key if I actually build some app that I want to publish, this way I will have binaries ready for multiple platforms.
I also have an idea for a product. Having the Pis will allow me to start working on that, and have a way to test. But ultimately, I feel their are some workloads that the Pis are better suited for. PiHole, Home Assistant, some indexing tasks. Plus, I just think it’ll be cool.
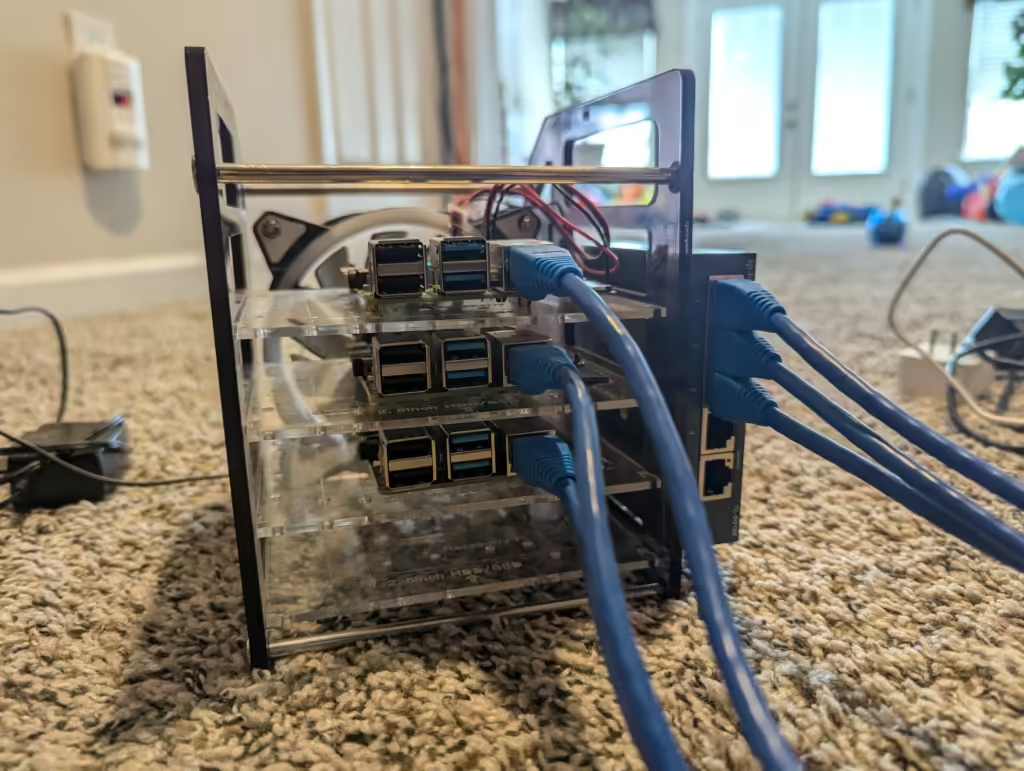
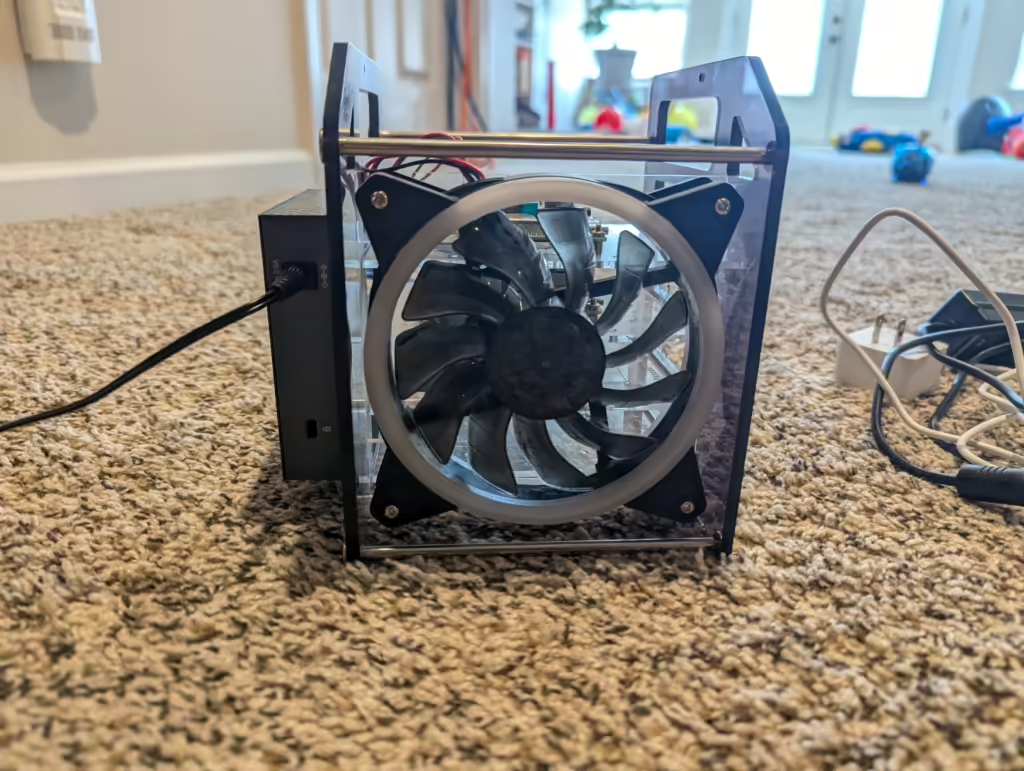
So, this is what I got. It came as a package deal — 2x Raspberry Pi 4b-8GB, 1x Raspberry Pi 4b-4GB, 5port TP-Link switch, power cables for the PIs, the case, RGB fan, and some extra heatsinks. Each rPi also had an 32GB Samsung EVO SD-CARD.
Now, while the case looks cool, especially with the fan, this is ultimately going into my cabinet. At first I thought I’d just put one of my shelves back in, and sit this on the shelf. But then I got to thinking. I’d have to run not only ethernet, but power to each rPi. True, with the switch I technically only need one ethernet, but the switch is not managed, so everything would be one VLAN. Not ideal. Plus, do I really want to install the shelf, run the cabling for the power and ethernet? Or, do I just purchase a rPi rackmount, case, get the PoE Hats and take advantage of my “beef king” ICX6610, which supports PoE?
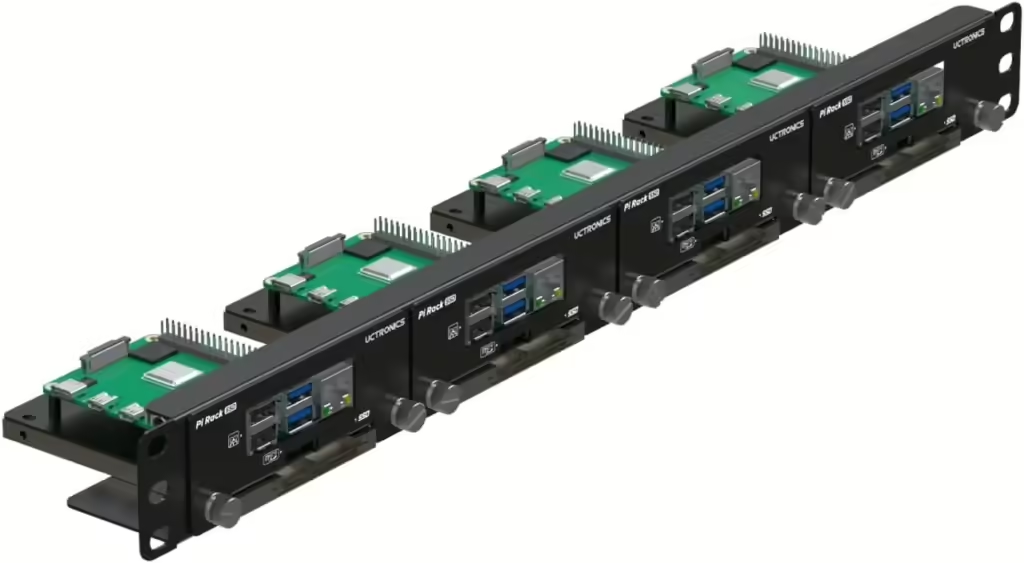

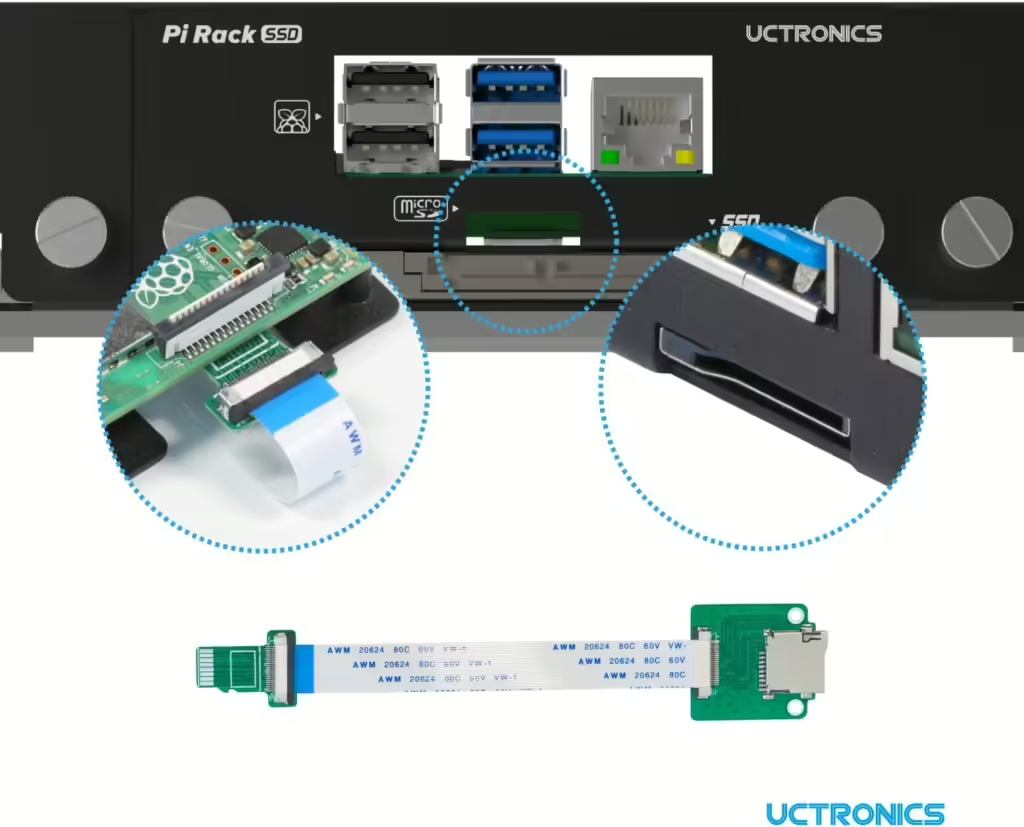
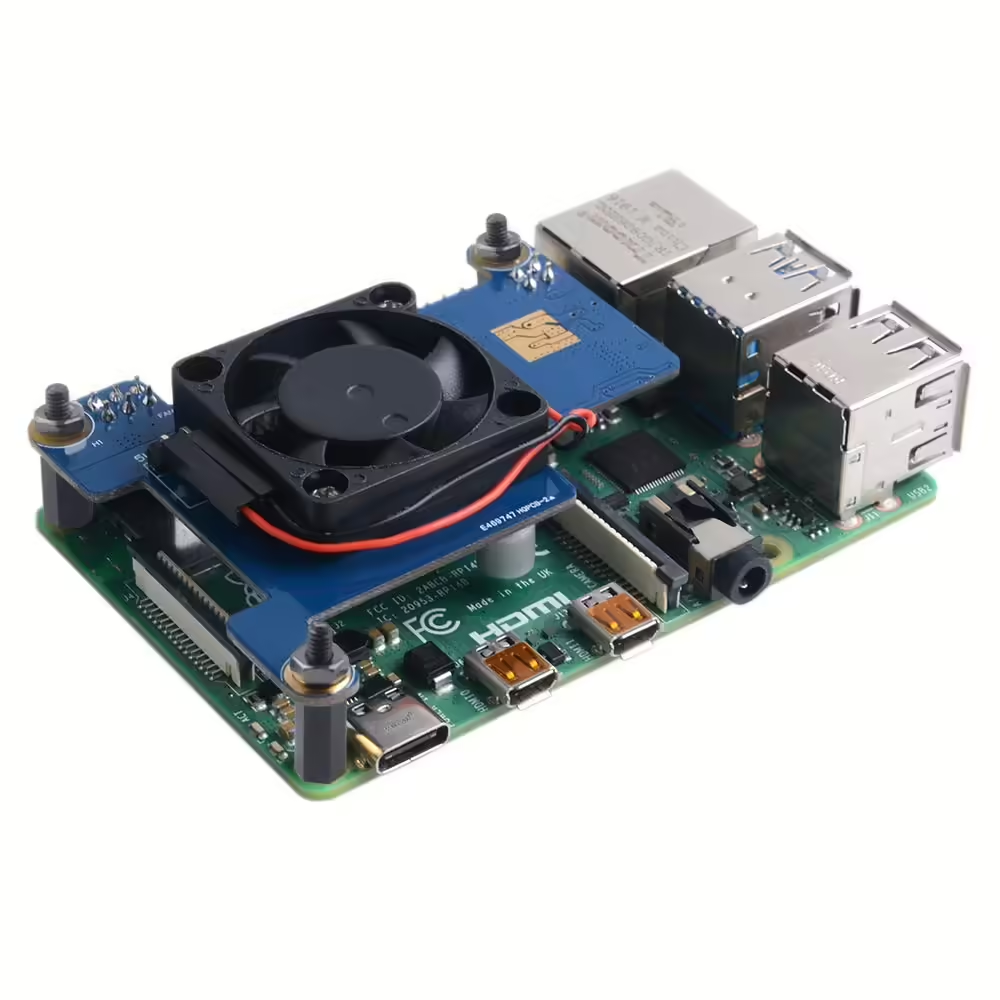
So a quick Amazon check, and I find this gem. Supports 4x rPi 3b/4b, space for an 2.5in SSD, and you can purchase the cable that allows the SDCARD to be accessed from the front. Add the PoE hat:

We’re off to the races. Though I’m a little upset with myself. Last night, I was doing some more reading, and I found a few posts on how to netboot ESXi without the need for SDCARDs or USB. This changed my entire plan. Do I want to run the Pi completly diskless, just netboot and use iSCSI or NFS for the datastores? If I do it this way, the SSD shelf is not needed, nor are the cables for the SDCARD (or the usb drives I ordered to use as the boot medium). Well… We’re going to try.
Setup Kickstart Server
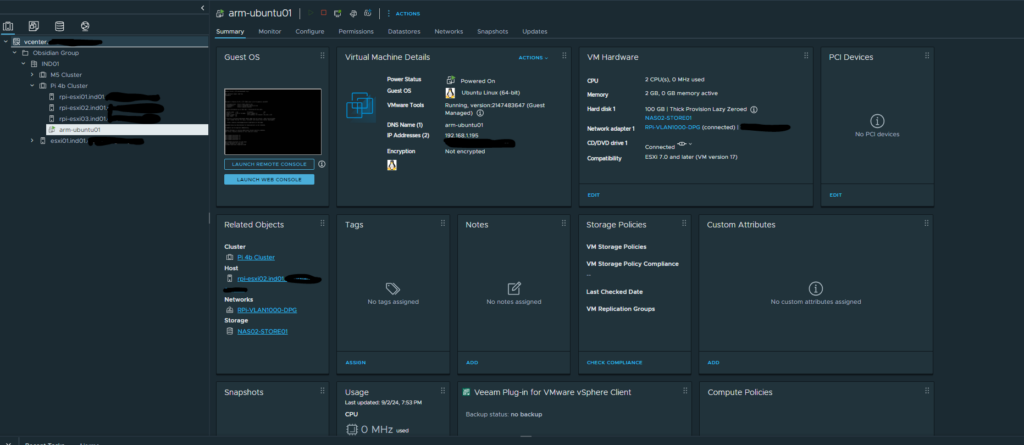
So, off we go. Using William Lam’s Guide as a starting point, first we install Ubuntu 24.04 as Ubuntu is what I mainly use (William’s guide is based off 16.04), and the installation media is already on my datastores.
Step 1 – Install Ubuntu 24.04, and apply any patches/upgrades. I’ll also set the timezone as well. I normally use ansible to do the base setup of a new host, but I am doing everything manually now.
root@kickstart:# apt update
root@kickstart:# apt upgrade
root@kickstart:# dpkg-reconfigure tzdata

Current default time zone: 'America/Indiana/Indianapolis'
Local time is now:      Sat Aug 31 12:57:04 EDT 2024.
Universal Time is now:  Sat Aug 31 16:57:04 UTC 2024.

root@kickstart:# sync
root@kickstart:# reboot

Broadcast message from root@kickstart on pts/1 (Sat 2024-08-31 12:57:14 EDT):

The system will reboot now!
Step 2 – Install required packages
root@kickstart:~# apt install -y dnsmasq apache2 unzip zipStep 3 – Create dnsmasq configuration file:
dhcp-range=192.168.200.255,proxy
log-dhcp
enable-tftp
tftp-root=/srv/tftpboot

pxe-prompt="Booting PXE Client", 1

# ESXi AARCH64
dhcp-match=set:aarch64,60,PXEClient:Arch:00011:UNDI:003000
dhcp-boot=tag:aarch64,esxi-arm/efi/boot/bootaa64.efi

# rPI AARCH64
pxe-service=0,"Raspberry Pi Boot"
I already have a DHCP server running, so the proxy statement tells dnsmasq to use the DHCP server for addresses.
Step 4 – Create the following directory structure which will be used to host both our UEFI and ESXi-Arm installation files:
mkdir -p /srv/tftpboot/
mkdir -p /srv/tftpboot/rpi-uefi-1.20/
Step 5 – Download and upload the ESXi-Arm ISO to the Kickstart server. First, you will have to head over to the Broadcom Flings site and look for the ESXi Arm Edition. As of now, the current version is 1.15, and can be found here.
Step 6 – Mount the ESXi-Arm ISO and copy the installation files to our TFTP directory
unzip ESXi-Arm-ISO-1_15-dl.zip
mount -o loop VMware-VMvisor-Installer-7.0.0-22949429.aarch64.iso /mnt/
cp -rf /mnt /srv/tftpboot/esxi-arm
umount /mnt
Step 7 – I need to make a few changes to the ESXi-Arm boot.cfg file to tell it where to find our kickstart configuration file as well as the path to the files.
sed -i ‘s#/##g’ /srv/tftpboot/esxi-arm/efi/boot/boot.cfg
sed -i ‘s#prefix.*#prefix=esxi-arm#g’ /srv/tftpboot/esxi-arm/efi/boot/boot.cfg
sed -i ‘s#kernelopt=.*#kernelopt=ks=http://192.168.120.212/ks.cfg#g’ /srv/tftpboot/esxi-arm/efi/boot/boot.cfg
The complete edited boot.cfg file now looks like:
bootstate=0
title=Loading ESXi installer
timeout=5
prefix=esxi-arm
kernel=b.b00
kernelopt=ks=http://192.168.120.212/ks.cfg
modules=jumpstrt.gz — useropts.gz — features.gz — k.b00 — procfs.b00 — vmx.v00 — vim.v00 — tpm.v00 — sb.v00 — s.v00 — ena.v00 — bnxtnet.v00 — bnxtroce.v00 — brcmfcoe.v00 — brcmnvme.v00 — elxiscsi.v00 — elxnet.v00 — i40en.v00 — i40iwn.v00 — iavmd.v00 — igbn.v00 — iser.v00 — ixgben.v00 — lpfc.v00 — lpnic.v00 — lsi_mr3.v00 — lsi_msgp.v00 — lsi_msgp.v01
— lsi_msgp.v02 — mtip32xx.v00 — ne1000.v00 — nenic.v00 — nfnic.v00 — nhpsa.v00 — nmlx4_co.v00 — nmlx4_en.v00 — nmlx4rd.v00 — nmlx5_co.v00 — nmlx5_rd.v00 — ntg3.v00 — nvme_pci.v00 — nvmerdma.v00 — nvmxnet3.v00 — nvmxnet3.v01 — pvscsi.v 00 — qcnic.v00 — qedentv.v00 — qedrntv.v00 — qfle3.v00 — qfle3f.v00 — qfle3i.v00 — qflge.v00 — rste.v00 — sfvmk.v00 – — smartpqi.v00 — vmkata.v00 — vmkfcoe.v00 — vmkusb.v00 — vmw_ahci.v00 — elx_esx.v00 — btldr.v00 — esx_dvfi.v00 — esx_ui.v00 — esxupdt.v00 — tpmesxup.v00 — weaselin.v00 — loadesx.v00 — lsuv2_hp.v00 — lsuv2_in.v00 — lsuv2_ls.v00 — lsuv2_nv.v00 — lsuv2_oe.v00 — lsuv2_oe.v01 — lsuv2_oe.v02 — lsuv2_sm.v00 —native_m.v00 — qlnative.v00 — vmware_e.v00 — vsan.v00 — vsanheal.v00 — vsanmgmt.v00 — tools.t00 — imgdb.tgz — imgpayld.tgz
build=7.0.0-1.15.22949429
updated=0
Step 8 – Create /var/www/html/ks.cfg which is the Kickstart configuration file and replace the IP Address within the file to reflect the address of your Kickstart server which will be serving out the uefi.zip file that we had copied over earlier.
My kickstart configuration file is as follows. I’m using DHCP initially for the nic, and setting a default password. Both of which would be updated after install. I’m also suppressing the warnings about the shell being enabled.
vmaccepteula
install –firstdisk=usb –overwritevmfs
reboot
rootpw VMware1!
network –bootproto=dhcp –device=vmnic128
%post –interpreter=busybox
mkdir -p /tmp/uefi
wget http://192.168.120.212/uefi.zip -O /tmp/uefi/ufei.zip
unzip /tmp/uefi/ufei.zip -d /tmp/uefi/
rm -f /tmp/uefi/ufei.zip
USB_DEVICE=$(grep “install –firstdisk ==” /var/log/weasel.log | grep -v grep | awk ‘{print $6}’)
mcopy -i “/dev/disks/${USB_DEVICE}:1” -vs /tmp/uefi/* ::/
%firstboot –interpreter=busybox
# Ensure hostd is ready
while ! vim-cmd hostsvc/runtimeinfo; do
sleep 10
done
# enable & start ssh
vim-cmd hostsvc/enable_ssh
vim-cmd hostsvc/start_ssh
# enable & start ESXi Shell
vim-cmd hostsvc/enable_esx_shell
vim-cmd hostsvc/start_esx_shell
# Suppress Shell Warnings
esxcli system settings advanced set -o /UserVars/SuppressShellWarning -i 1
esxcli system settings advanced set -o /UserVars/ESXiShellTimeOut -i 1
Step 9 – Before enabling dnsmasq, with Ubuntu the systemd-resolver needs to be disabled. Doing this, I must also remove the default resolv.conf and create my own.
systemctl disable systemd-resolved.service
service systemd-resolved stop
rm /etc/resolv.conf
systemctl enable dnsmasq
systemctl start dnsmasq
systemctl enable apache2
systemctl start apache2
Setup Raspberry Pi
I followed the exact instructions listed here under Setup rPI, but ran into some problems. First, the version of the EEPROM Update, and the location are different. 2020.09.03 as a Beta is no longer beta, and has since moved on to 2024, and the version of the rpi-uefi bios is now 1.38. I’ve flashed my rPi’s all to the current version, and here is where I ran into issues..
The rPi would boot, and was my kickstart server started responding. But for whatever reason, the bootfile that I configured does not get sent. Here’s a snipit of the logs:
2024-08-31T20:17:29.601527-04:00 kickstart dnsmasq-dhcp[4647]: 1353059364 available DHCP subnet: 192.168.120.255/255.255.255.0
2024-08-31T20:17:29.601746-04:00 kickstart dnsmasq-dhcp[4647]: 1353059364 vendor class: PXEClient:Arch:00000:UNDI:002001
2024-08-31T20:17:29.601805-04:00 kickstart dnsmasq-dhcp[4647]: 1353059364 PXE(ens33) [MAC REMOVED] proxy
2024-08-31T20:17:29.601839-04:00 kickstart dnsmasq-dhcp[4647]: 1353059364 tags: known-othernet, aarch64, ens33
2024-08-31T20:17:29.601871-04:00 kickstart dnsmasq-dhcp[4647]: 1353059364 bootfile name: esxi-arm/efi/boot/bootaa64.efi
2024-08-31T20:17:29.601923-04:00 kickstart dnsmasq-dhcp[4647]: 1353059364 broadcast response
2024-08-31T20:17:29.601975-04:00 kickstart dnsmasq-dhcp[4647]: 1353059364 sent size:  1 option: 53 message-type  2
2024-08-31T20:17:29.602008-04:00 kickstart dnsmasq-dhcp[4647]: 1353059364 sent size:  4 option: 54 server-identifier  192.168.120.212
2024-08-31T20:17:29.602042-04:00 kickstart dnsmasq-dhcp[4647]: 1353059364 sent size:  9 option: 60 vendor-class  [MAC REMOVED]
2024-08-31T20:17:29.602078-04:00 kickstart dnsmasq-dhcp[4647]: 1353059364 sent size: 17 option: 97 client-machine-id  [MACHINE_IDREMOVED]...
2024-08-31T20:17:29.602107-04:00 kickstart dnsmasq-dhcp[4647]: 1353059364 sent size: 47 option: 43 vendor-encap  [VENDOR_ENCAP REMOVED]...
2024-08-31T20:17:29.602224-04:00 kickstart dnsmasq-dhcp[4647]: 1353059364 available DHCP subnet: 192.168.120.255/255.255.255.0
2024-08-31T20:17:29.602269-04:00 kickstart dnsmasq-dhcp[4647]: 1353059364 vendor class: PXEClient:Arch:00000:UNDI:002001
2024-08-31T20:17:29.602910-04:00 kickstart dnsmasq-tftp[4647]: error 0 Early terminate received from 192.168.120.215
2024-08-31T20:17:29.603017-04:00 kickstart dnsmasq-tftp[4647]: sent /srv/tftpboot/rpi-id/start4.elf to 192.168.120.215
2024-08-31T20:17:29.604839-04:00 kickstart dnsmasq-tftp[4647]: sent /srv/tftpboot/rpi-id/config.txt to 192.168.120.215
2024-08-31T20:17:29.617224-04:00 kickstart dnsmasq-tftp[4647]: file /srv/tftpboot/rpi-id/pieeprom.sig not found for 192.168.120.215
2024-08-31T20:17:29.649884-04:00 kickstart dnsmasq-tftp[4647]: file /srv/tftpboot/rpi-id/recover4.elf not found for 192.168.120.215
2024-08-31T20:17:29.682541-04:00 kickstart dnsmasq-tftp[4647]: file /srv/tftpboot/rpi-id/recovery.elf not found for 192.168.120.215
2024-08-31T20:18:06.249553-04:00 kickstart dnsmasq-tftp[4647]: failed sending /srv/tftpboot/rpi-id/start4.elf to 192.168.120.215
First thing that jumped out at me was the Vendor Class. Mine is:
vendor class: PXEClient:Arch:00000:UNDI:002001
From the article, William uses:
PXEClient:Arch:00011:UNDI:003000
I’m not sure what the difference is — I got the same ID for both my 4g and 8g models. But this is where we got stuck. I followed the instructions, and for some reason the correct bootfile was not being sent. I noticed though, when I manually selected PXE Boot, the ESXi installer did start correctly.
After a few more tries, and more troubleshooting, I decided that since I had everything I needed, while a SDCARD-less way of booting (and even completely booting from network) is still a possibility, and something I will conquer, I wanted to get ESXi installed. Basically, when the installer started, it was sloooow and I got inpatient. So I sorta abandoned the idea, just to get my cluster going. I do have another rPi 4b coming, so I will get the stateless ESXi-Arm going.
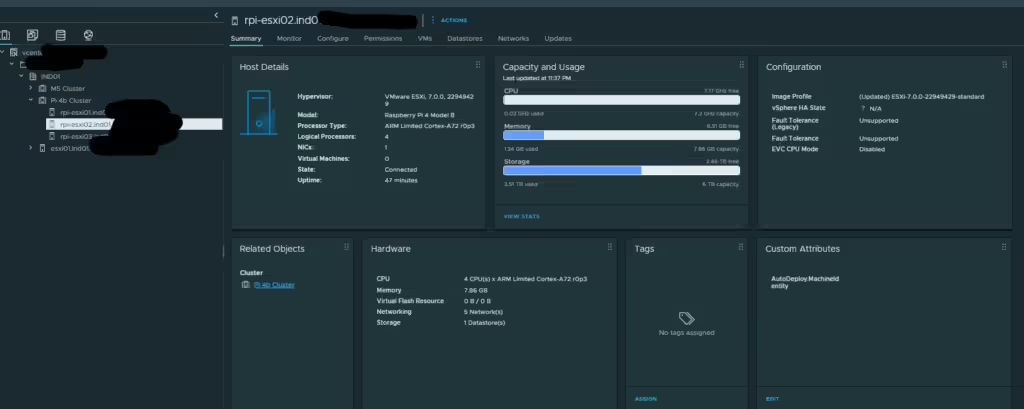
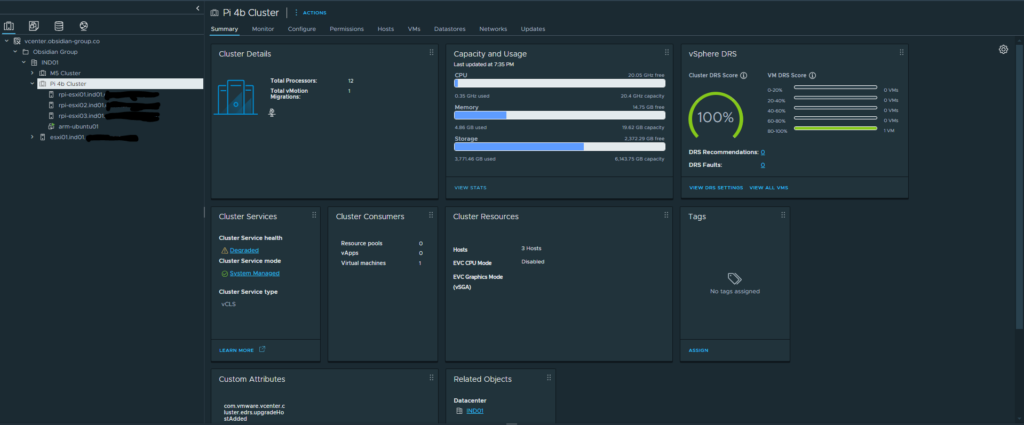
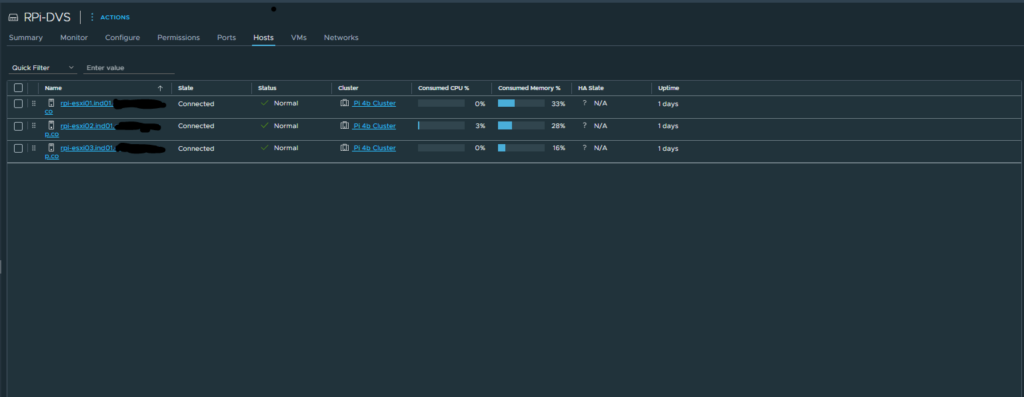
So, after following the instructions here I installed ESXi on each of my rPi’s:
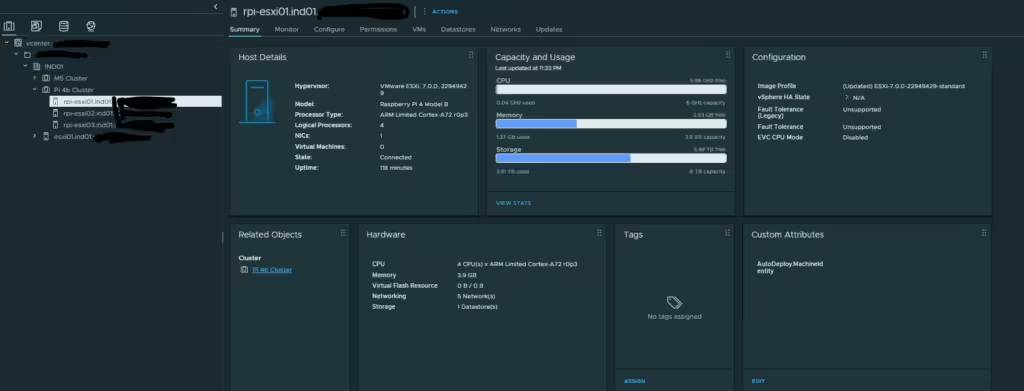
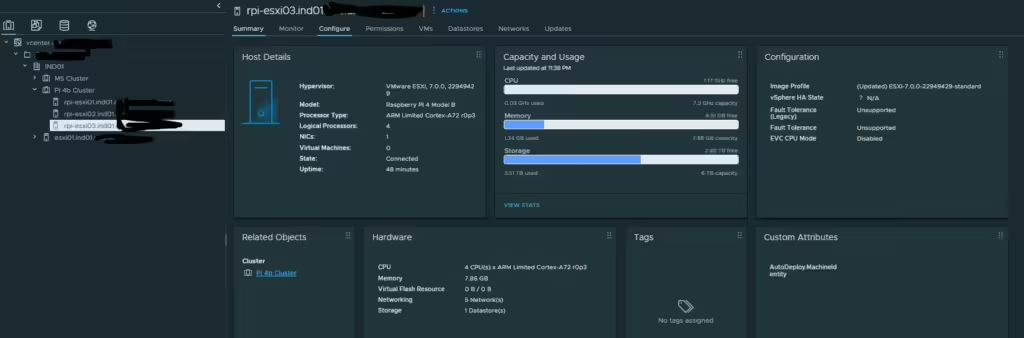
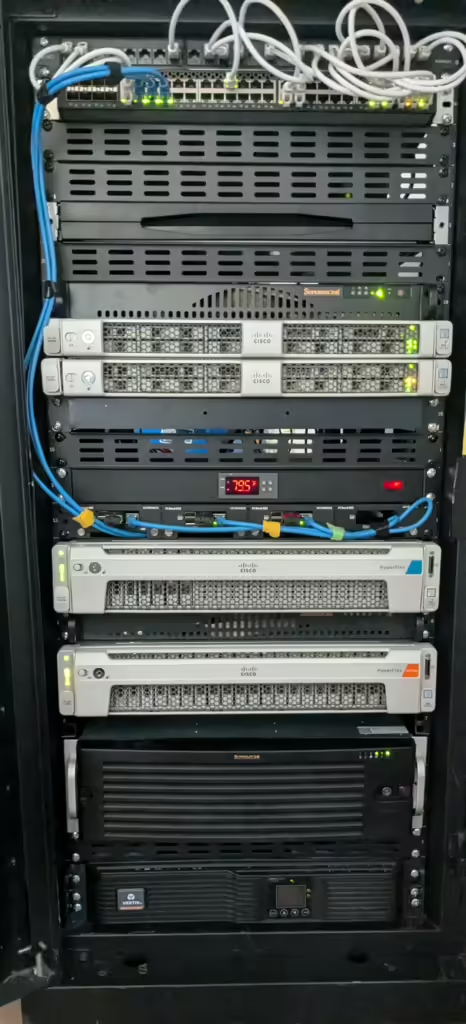
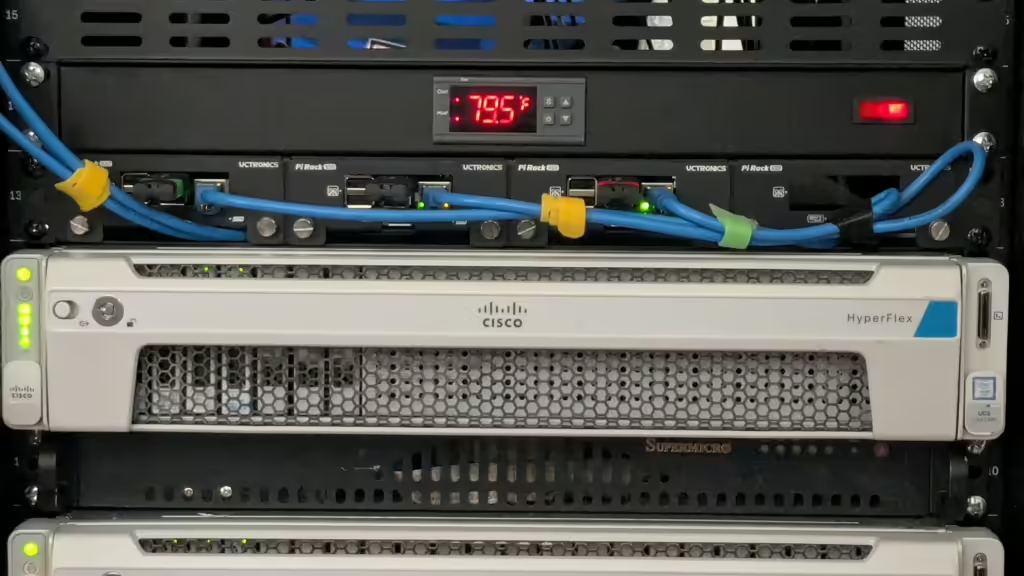
They are nice and cozy in their new home as well
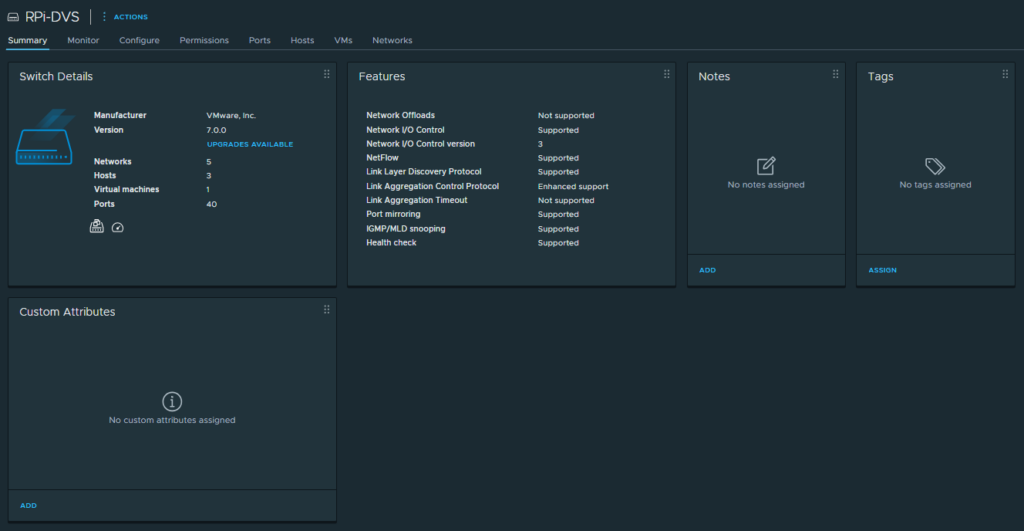
Each node is using the NAS for their datastores, and I am considering exporting the vSAN filesystem to these as well. I’ve configured a distributed vSwitch (dVs) and distributed port group (dPg) and have even tested vMotion’ing between the nodes, all went off without a hitch.
I haven’t done much more yet. But so far I’m having a blast. What’s next? The 4th Pi for testing stateless ESXi. Move some workloads over to the PIs.